Thursday, September 20, 2012
Sep 19/20 Insulation & Electrical
September 19
- Continued insulation of the ceiling with Roxul Safe'nSound insulation, I was done after about 3 hrs. This work so far hardest I encounter, mostly do to difficult placement of the a/c vents and me trying to cover every inch of ceiling space possible.
Hours: 1 x 3hours
September 20
Very productive day, with help of my dad and his positive attitude we managed to finish rest of the ceiling to be covered with sound/fire proof insulation.
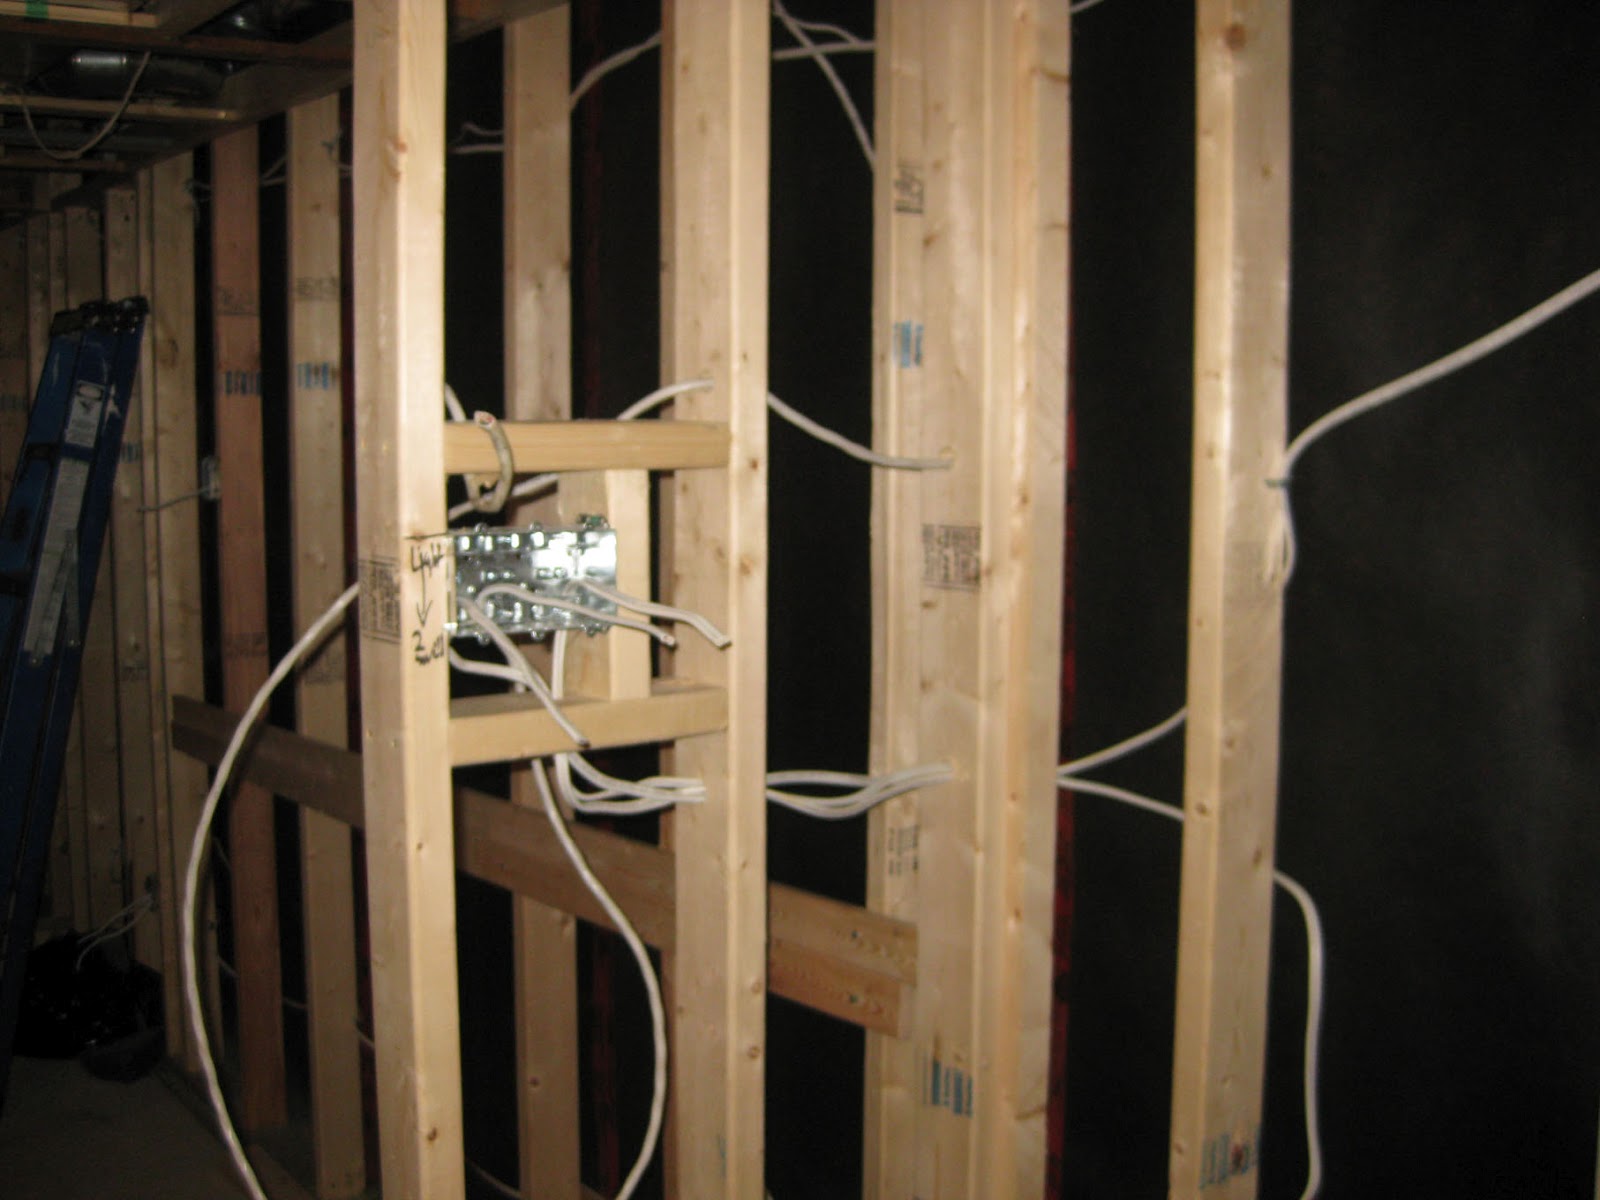
We also moved up to being about 70% done with electrical.
3 new circuits created (will need to add one more) that will power up 16 new outlets and 5 light fixtures and so far 19 pot lights.
- 3 spaces created that will be on 3 way dimmers (bar section, media room, and main room) all covered in 19 pot lights.
- Storage and laundry room will have regular 3 fixtures on 2 separate switches.
- Media room will have mood lighting just where the sitting section will be in the future.
Hopefully all will work.
Hours: 2 x 9 hrs = 18 hrs.Cost: Insulation $235, Cable used about 400ft so far FREE curtsy of my Dad.
Thursday, September 13, 2012
Sep 11 & 12 Framing Electrical & Insulation
September 11
Slow progress in that day:
- Deficiencies on framing work where it was still missing and needed to be changed
- Framing on 1 of 2 windows was done ready for drywall.
- Layout was done for where the electrical outlets will be placed.
- Planning for wall mount Plasma TV and future Projector and wall reinforcement to hold the wall mount.
Hours: 1x8+ (1x5) =13 Hrs Total
Cost: $72 Wall mount electrical bracket plust a bag of insulation Roxul Safe'n'Sound.
September 12
- Modification to division of one space was done (framing).
- Window 2 out of 2 windows was done for framing.
- Electrical boxes and light switch boxes attached.
- 1 bag of Sound Proof insulation placed (this was really crappy job!!! only covered about 60sq/ft) will need about 10 bags to finish whole space. Process is slow and messy as there is lot of piping that have to get covered.
Hours: 2x5hrs = 10 Hrs Total
Cost: (Some electrical boxes, and some wood) $40
Thursday, September 6, 2012
Sep 4, 5, & 6 Getting ready for electrical!
September 4, 201
Back from "vacation" mode started on September 4th where we finished up some framing on some drainage pipe taking most of the day. Work wasn't to difficult and took about 8 hours with some breaks for both of us.
Cost: 2x4s $30
Soundproof insulation 1 bag $45 (for later use)
Time Spent: 2 man x 8 hrs.
September 5 & 6, 2012
Code in Canada dictates that putting pot lights where insulation is used needs to be separated or not in contact with insulation. To avoid putting expensive enclosures (about 30$ each) it was decided that after putting soundproof insulation it will be separated with plywood enclosures. That way there is no added cost and some scrap plywood we had will be used up.
Roughly it was decided that for area of two main spaces there will be about 20 pot lights used, which would have needed about 20 enclosures. Money saved about $600 :)
Time spent 1 man x 14 hrs
Money saved: ~$600
Back from "vacation" mode started on September 4th where we finished up some framing on some drainage pipe taking most of the day. Work wasn't to difficult and took about 8 hours with some breaks for both of us.
Cost: 2x4s $30
Soundproof insulation 1 bag $45 (for later use)
Time Spent: 2 man x 8 hrs.
September 5 & 6, 2012
Code in Canada dictates that putting pot lights where insulation is used needs to be separated or not in contact with insulation. To avoid putting expensive enclosures (about 30$ each) it was decided that after putting soundproof insulation it will be separated with plywood enclosures. That way there is no added cost and some scrap plywood we had will be used up.
Roughly it was decided that for area of two main spaces there will be about 20 pot lights used, which would have needed about 20 enclosures. Money saved about $600 :)
Time spent 1 man x 14 hrs
Money saved: ~$600
Saturday, July 7, 2012
Framing in Jun
So I been slacking off with work and the blog, it's hard to work when the weather is nice and there is 100 other things to be done.
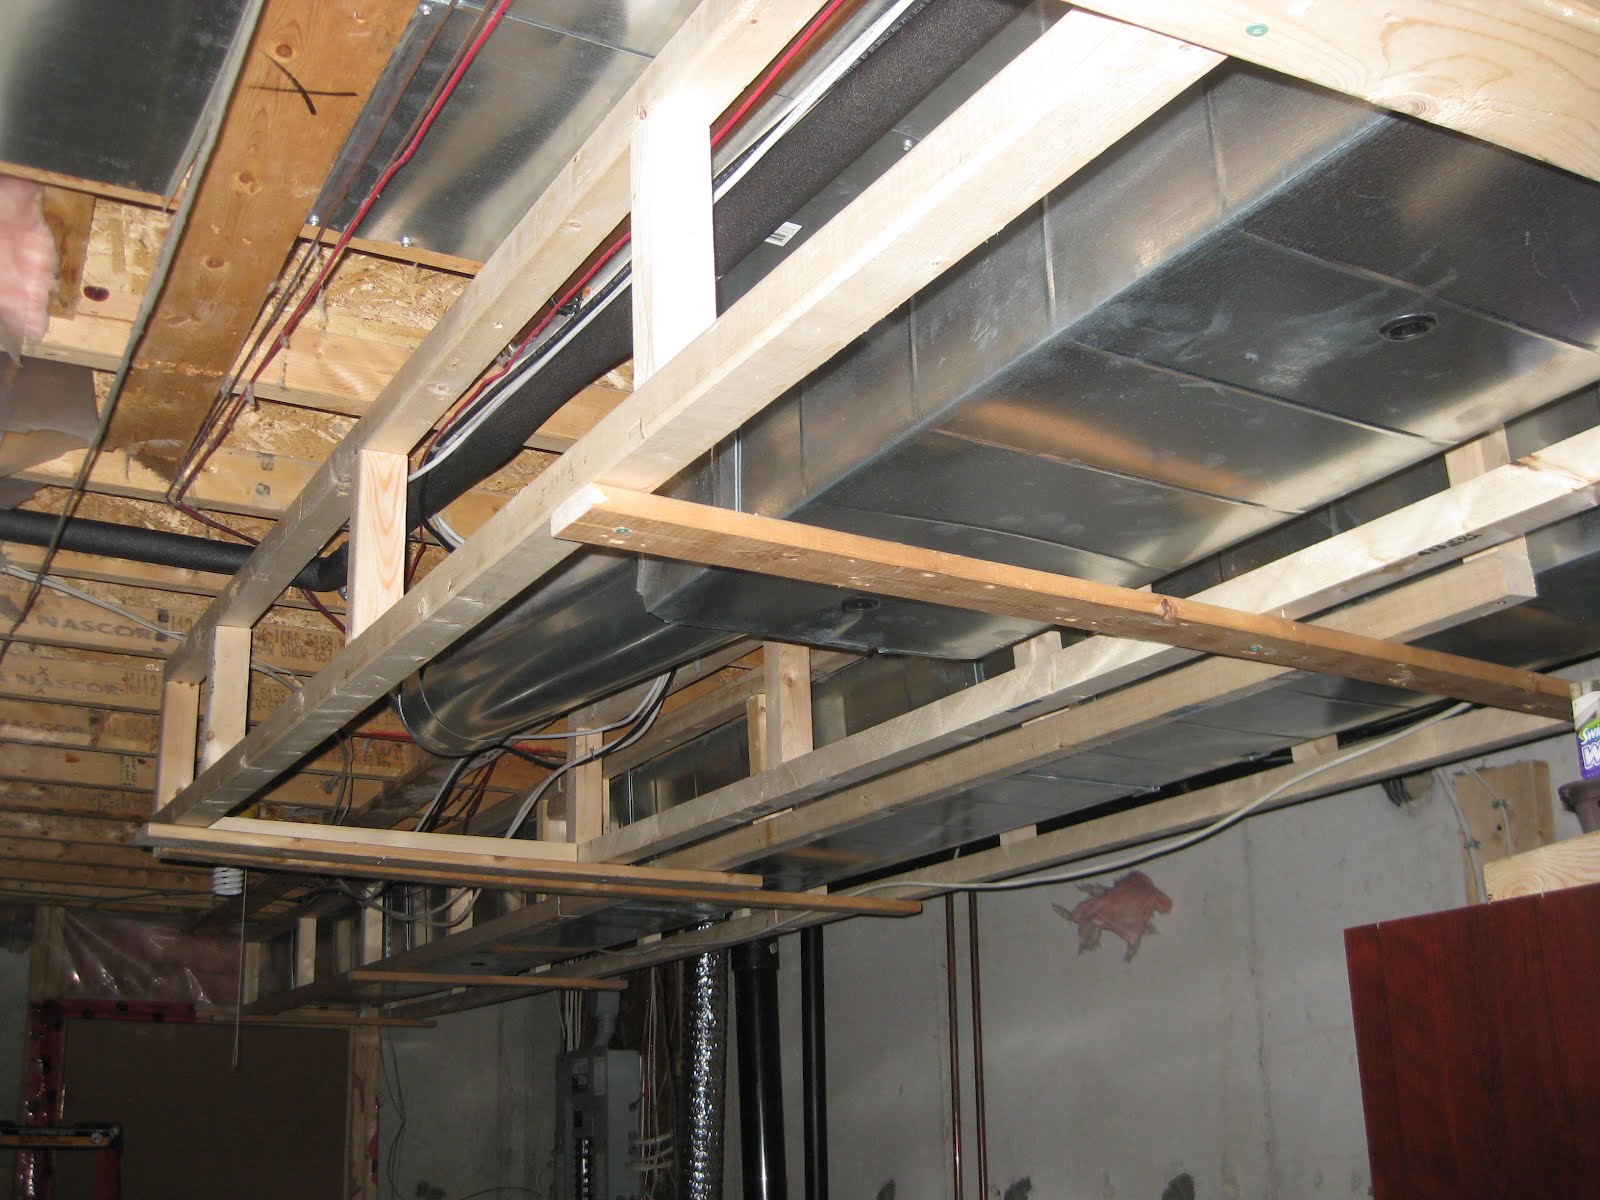
Since my last post there was roughly another 5 days of work that were done and $400 dollars spent pretty much on 2x4's also got some 1x3's to do framing for the ceiling.
Few Pics are attached and framing is almost done.
The parts that did slow me down were doing the round angles around the water heater unit and HVAC.
Cost: $400
Time: 5 days
P.S I suspect that due to my wedding Jul and Aug will be my 2 months off :)
Since my last post there was roughly another 5 days of work that were done and $400 dollars spent pretty much on 2x4's also got some 1x3's to do framing for the ceiling.
Few Pics are attached and framing is almost done.
The parts that did slow me down were doing the round angles around the water heater unit and HVAC.
Cost: $400
Time: 5 days
P.S I suspect that due to my wedding Jul and Aug will be my 2 months off :)
Saturday, May 19, 2012
May 14 Framing wall #2 and #3
Putting up the moisture barrier didn't take too much time or difficulty. This time instead of construction epoxy to hold it against the concrete wall, moisture barrier epoxy was used.
For one it's much cheaper (about $6 for big tube) and it states that it never dries.
Things would have moved faster but putting the top plates we ran into couple problems that did slow down the progress but all together it was about 10 hrs to complete (that includes few breaks ;) )
Time spent: 10 hrs
Cost: ~ $150 (included 2x4, roll of moisture barrier paper, tape, and 100 pack of concrete screws.
Thursday, May 17, 2012
End of April - May 12 Cracks LTD continues
After framing the first wall and running out of product to finish remaining cracks in foundation I took a bit of a break. After another kit came I worked on them randomly and they became bit easier to work in.
May 12 was the last day for foundation repairs.
Total structural cracked fixed: 12
Leaking or showing moisture signs our of 12: 4
Total cost of kit: ~$1,000
Saved: ~ $4,000 (after the cost of kit as per quote from crack doctor, (average is $500 per crack they charge)
Time spent: Hard to say, I'd say average is 3 hrs/crack not including time for epoxy to dry.(Total of about:36 hrs)
Other option was to dig out foundation around the house and water proof but that cost is about in range of $10,000 depending on the size of the lot and access.
Finally .... Foundation all done.
Sunday, April 15, 2012
Apr 12 - Framing first wall

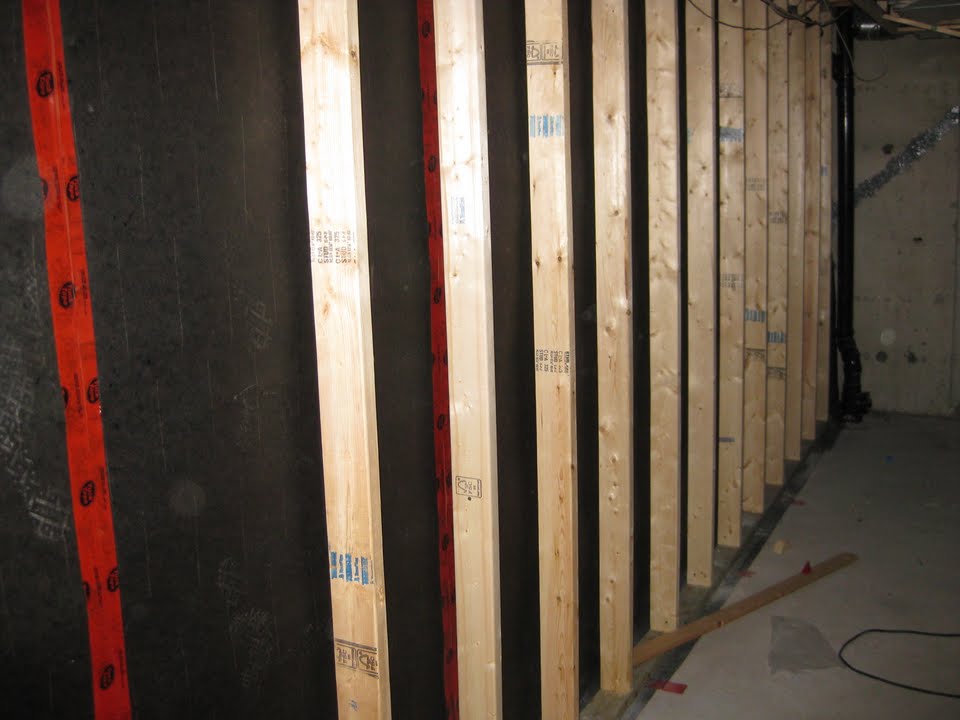
Here are some pics of the first wall that got framed.
After two foundation cracks were fixed on that specific wall it was ready to be framed.
Doing it right; concrete slab is covered with moisture barrier paper and tapped on joining parts. Construction epoxy was used to hold it in placed and stapled to the top beams.
1" inch gap was left between the 2x4's and the foundation to avoid moisture problems in the future.
Time spent: 8 hrs
Cost: Moisture barrier paper: $25 (still about half of a roll left)
Moisture barrier foil (will go on top of pink insulation): $35
2x4's about 30 of them used (bottom ones must be pressure treated):$75
April 11 - Foundation Repairs Session 1
Today I have spent quiet bit of time on repairing multiple cracks in the concrete foundation.
Not sure if the concrete was poured in winter but it has developed about 11 cracks, where average house has 3-5 tops. I didn't noticed any of them leaking but some of them showed some moisture getting through and few of them can be seen outside on the exterior. Other ones are just hairline thin and that makes them very difficult to be treated via polyurethane injection.
I did prepared cracks few days before what included hammering the uneven concrete and using metal brush to clean them and then wipe them clean. It was 4-6 hrs total I did spent on that.
After getting the full kit from U.S from
http://www.radonseal.com/crack-injection/diy-injection.htm
which cost $430 (that included $50 shipping via UPS) and then total of $90 of duty and brokerage fee by UPS I have received enough product to treat 30ft of linear cracks.
I was able to fill 4 of fairly big cracks with that and still have couple tubes left.
I have learned that ports have to very well attached and covered with epoxy as well as the crack itself, as if there is a weak spot the pressure of injecting will blow the port and make the whole job not only messy but difficult to continue. The polyurethane will start reacting and won't make further injection possible to the same port. I had few ports that I couldn't make the product leak from the port above and just closed it after I felt there is no more polyurethane going in.
Corner crack was very difficult to attach the ports to and I had a lot of difficulty to inject the product I have to admit that crack was very thin.
I'd like to note that it's a very slow process time for epoxy to dry also patience is a key as it takes 5-10 min or longer to go from port to port.
I had to order refill of the product and some extra ports that will cost me in total of about $400 should be about $100 cheaper and I should get 50 ports extra. I have learned when used closer together about 6" apart then 8" apart it's much easier to inject product.
It is very slow process and time is needed for epoxy to dry; also patience is a key as it takes 5-10 min or longer to go from port to port
Time spent:
Cleaning and prep work: 5 hours
Treating 4 cracks about 8-10 ft long each: 14 hrs
Cost: $900
The average quote to treat 1 crack is about $500 dollars and with discount for multiple I was still looking at about $4000 in repairs of my foundation, I guess spending $900 dollars doesn't sound too bad.


Not sure if the concrete was poured in winter but it has developed about 11 cracks, where average house has 3-5 tops. I didn't noticed any of them leaking but some of them showed some moisture getting through and few of them can be seen outside on the exterior. Other ones are just hairline thin and that makes them very difficult to be treated via polyurethane injection.
I did prepared cracks few days before what included hammering the uneven concrete and using metal brush to clean them and then wipe them clean. It was 4-6 hrs total I did spent on that.
After getting the full kit from U.S from
http://www.radonseal.com/crack-injection/diy-injection.htm
which cost $430 (that included $50 shipping via UPS) and then total of $90 of duty and brokerage fee by UPS I have received enough product to treat 30ft of linear cracks.
I was able to fill 4 of fairly big cracks with that and still have couple tubes left.
I have learned that ports have to very well attached and covered with epoxy as well as the crack itself, as if there is a weak spot the pressure of injecting will blow the port and make the whole job not only messy but difficult to continue. The polyurethane will start reacting and won't make further injection possible to the same port. I had few ports that I couldn't make the product leak from the port above and just closed it after I felt there is no more polyurethane going in.
Corner crack was very difficult to attach the ports to and I had a lot of difficulty to inject the product I have to admit that crack was very thin.
I'd like to note that it's a very slow process time for epoxy to dry also patience is a key as it takes 5-10 min or longer to go from port to port.
I had to order refill of the product and some extra ports that will cost me in total of about $400 should be about $100 cheaper and I should get 50 ports extra. I have learned when used closer together about 6" apart then 8" apart it's much easier to inject product.
It is very slow process and time is needed for epoxy to dry; also patience is a key as it takes 5-10 min or longer to go from port to port
Time spent:
Cleaning and prep work: 5 hours
Treating 4 cracks about 8-10 ft long each: 14 hrs
Cost: $900
The average quote to treat 1 crack is about $500 dollars and with discount for multiple I was still looking at about $4000 in repairs of my foundation, I guess spending $900 dollars doesn't sound too bad.


Thursday, March 29, 2012
March 27 - 28 Ductwork framing started !
Also I have finished insulation of cold water 1/2" pipe all over the basement something that builder didn't do. That way we won't get moisture dropping down on finished drywall. Used about 10 of 8ft long foam pipe insulation cost of about 20 bucks probably the cheapest material I bought so far.
Time spent: 12 hrs
Saturday, March 24, 2012
Mar 19 - 20 Plumbing & Drainage Clean up
Even tho we did spent 12 or more hours in these two days working it really doesn't show.
Time spent: 12 hrs
Before:

After


The other side where pipe was running in the middle of the ceiling, it got moved nicely against the wall.
March 19: We started our day with removing old pink insulation that was covering concrete slab kind of half way. It was cut about 15" so it can be re-used when we put up the framing. This actually went pretty quickly we had everything packed up in bags in about 2-3 hrs.
Next it was noticed there is a long about 8' long drainage pipe just below the ceiling joists that would be in a way of drywall. It got moved closely against the wall so 2x4 can be trimmed and go inside the wall so we don't loose ceiling height.
March 20: Moving draining pipes continued. I guess you can't expect the builder to put the drain pipes nicely out of the way. Ours were right in the middle where future storage room will be.
6 hrs later the drain pipes are nicely tacked in against the wall where they will stay.
Pictures coming soon
Time spent: 12 hrs
Before:
After
The other side where pipe was running in the middle of the ceiling, it got moved nicely against the wall.
Mar 19, 2012 official start of work on the basement
So after almost two years purchase anniversary in May this year and I have finally decided to start working on finishing the basement in my house.


This wouldn't happen if it wasn't for some pressure from my dad, him being only 73 but having much more energy then me. I guess if it wasn't for him saying that paying under 10 bucks per drywall sheet is a good deal I wouldn't have 58 sheets of drywall in my basement now.
Let me tell you one thing taking this down in that tight hallway is no fun.
I figured that this project will be a good point to start using my blog to learn how this blogging thing works.
Time spent: 7 hrs
Cost of drywall: $700 (20 sheets of lightweight for ceiling and 38 regular for the walls)
Time spent: 7 hrs
Cost of drywall: $700 (20 sheets of lightweight for ceiling and 38 regular for the walls)
Subscribe to:
Posts (Atom)